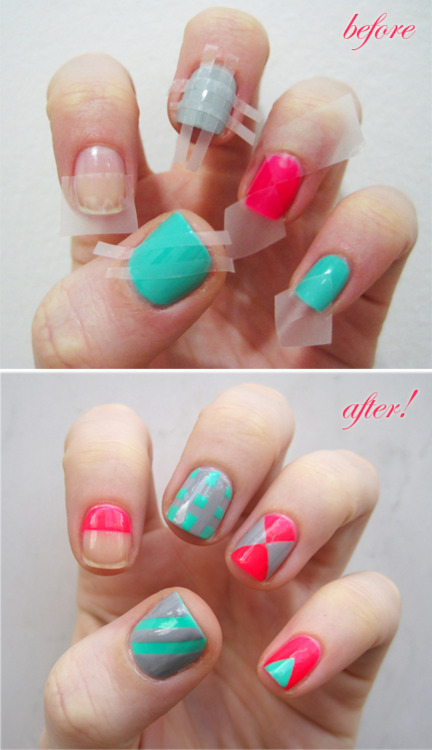
If you have a tough time creating straight lines with your striper brushes,say hello to your new best friend: Scotch tape! You can cut it into any geometric shape you want to create straight lines on your nails. Here are a few ideas to get you started!
- Its best to do this on day-old nail paint so that its completely dry and doesn't come off along with the scotch tape. But if you really have to do it on day one,then give your base colour an hour's drying time."
- Cut Scotch Tape to the desired size and shape, and apply firmly to the nail. Run another nail along the edge of the tape to assure a tight seal. You don’t want any polish to run underneath the tape as you paint!
- Fill in the stenciled area with a contrasting shade of polish, and slowly remove the tape while the polish is still wet.
- Allow the polish to dry completely so the colors don’t smear into each other, and then finish off with a good top coat.

Another super way to use scotch tape is by applying nail paint on the non-sticky side of the scotch tape,waiting for it to dry and then cutting it out into the shape you want and just sticking it onto your nails! The tape merges with your nails and looks like plain nail polish on your nails! Apply a top coat to seal in your design.

You can do this design with normal scissors or you can even use craft scissors which have different shaped blades.

Other nail art designs you can try using scotch tape:


HAVE FUN! =D
No comments:
Post a Comment